Friday, September 30, 2016

Simply Peace and a Merry Christmas Card


Today I'm sharing with you two of my favorite Christmas cards.  Elegant in their simplicity, these are cards you can make a lot of in a short amount of time and they are flat and easy to mail.  I'm making a lot of these to send this year.


Starting with "peace" the base is Shimmery White – my favorite card stock! Really, it is my favorite.  It stamps beautifully, you can watercolor on it and it has a glorious shimmer to it.  I used some washi tape to mask a rectangle then used my sponge dauber and Night of Navy ink to shade inside of that rectangle.  I might add that the washi tape comes right off, which doesn't always happen on Whisper White.


I stamped the stars from the stamp set Holly Jolly Greetings with Versamark, then used Heat & Stick Powder and Dazzling Diamonds Glitter on the stars.


I die cut the peace, which is part of the Christmas Greetings Thinlits, 3 times – once each from Silver Glimmer, Dazzling Diamonds Glimmer and Shimmery White.  While all looked great, my favorite was Dazzling Diamonds so I used my Fine Tip Glue Pen to adhere it.


That's it!  You're done.  Here is a variation on the Peace card.  This one is "daubered" with Real Red ink.  The greeting was cut from Red Glimmer Paper. For this one I layered a Shimmery White panel onto a Whisper White Card Base for a little different look (and makes that Shimmery White paper last longer!)


I used Basic Rhinestones instead of glitter and I added another word – Christmas, from Holly Jolly Greetings. Which do you like better?


Look at these other projects by Stampin' Up! using the Christmas Greetings Thinlits.


Tip:  when using a sponge dauber to add color I always start off the paper

Thanks so much for looking!  Let me know what you think!

Debbie

Be sure to use my October Host Code, 7ZKGME4F, when you shop online and be sure to check out the great deals in the Clearance Rack


SaveSave

Wednesday, September 28, 2016

Sweater Weather Fall Birthday Card

It's officially Fall and the leaves are starting to turn beautiful shades of yellow and red here, I'm anxious to get my sweaters out, but it's still 80 degrees so for now I'll settle for the Cable Knit Dynamic Textured Impressions Embossing Folder.  Wow!  That's a mouthful!  This "dynamic" embossing folder embosses a deeper more detailed impression.  It is so beautiful – I think of it as the cashmere of embossing folders.   


I embossed a panel of Very Vanilla Card Stock with the folder and layered that onto a layer of that yummy Copper Foil Sheets.  I so hope this paper is carried over!  I used the Vintage Leaves stamp set and stamped with Versamark 2 oak leaves and 1 maple leaf.  Those leaves were embossed using Copper Embossing Powder and I cut them out with the Leaflets Framelits.  I thought about adding a little color to the leaves, but decided to leave it alone.  


Instead I added some loops of Linen Thread and Copper Metallic Thread and tied the leaves together with a Linen Thread bow.  This "bouquet" was attached with Mini Glue Dots which are the perfect adhesive for dimensional elements like these leaves.


I added a birthday greeting from Build a Birthday, again embossing with Copper Embossing Powder.  I think you could use this for a get well or sympathy or most anything for that matter!  Just wish I could have captured the copper on the leaves a little better but my mobility is still very limited and the light I had just didn't show it.  I snapped this picture with my iPhone on my kitchen counter, which shows the beautiful copper leaves a little better.


Tips:  To make my precious Copper Foil Paper go a bit further, I cut the center out of my panel to save for another project.


You need to get ready for sweater weather and add this embossing folder to your collection!  You will love it. Check out this YouTube video on the embossing folder.


Thanks for looking

Debbie

When shopping online with me use the September Host Code,TYAEUADU, and be sure to check out the Clearance Rack for some great deals!
SaveSave

Monday, September 26, 2016

Watercolor Flowers Birthday Card

Tying my hand at watercolor flowers – I have some work to do to perfect it, but for my first try I'm pleased!

It's just as simple as painting circles with ink and your Aqua Painter on Watercolor Paper.  I spritzed the whole piece of watercolor paper with water -- next time I won't do this and maybe I won't get the bleeding from one flower into another.  I want to do a video on this.


My inks were layers as follows – I started with Blushing Bride, while still wet I added Watermelon Wonder.  I used my heat tool at this point to dry the ink then added a drop of diluted Garden Green to the center.  Used my Heat Tool to dry the green then added Crushed Curry around the green.  The green bled into the yellow a bit so is a little washed out.  At this point I sprayed my fingers with water and flicked water onto the watercolor paper then once again dried it with my Heat Tool.  I love those little splotches.


Finally I used the Clear Wink of Stella to add shimmer to the Crushed Curry.  When all the ink was dry I used one of my favorite tools, the Embossing Buddy,  to wipe all over the center then embossed the Stylized Birthday greeting in black. 


To finish the card I layered the watercolor onto Basic Black then on to a half sheet of Watermelon Wonder.

Stampin' Tips:

I always us Fast Fuse when adhering Watercolor Paper.

Stampin' Up! currently does not sell black embossing powder.  What?  I know!  Here is a solution that works pretty well – ink your stamp very well with Versamark ink then stamp it onto the ink pad of your choice.  Occasionally doing this doesn't seem to affect the ink.

To watercolor I put a drop of refill ink in the lid of an open ink pad, adding water to dilute as needed, adding more ink as needed.  Alternately you can squeeze the ink pad to get ink onto the lid.  I wipe off the lid only if there is a lot of water left.

I hope I've inspired you to get out your inks and Aqua Painter and try this.

Debbie

Be sure to use the September Host Code TYAEUADU when placing online orders. Don't miss the great Clearance Rack deals.

Saturday, September 24, 2016

Halloween Decor BOO on Linen Canvas Frame


Halloween decorating is so much fun.  I found these cute 4" stretched linen canvases awhile ago at my Michaels store.  By the time I found them they were on clearance and they only had 3.  Wish I had more! (FYI they were by Make Market and described as Decor Linen Canvas 4 in x 4 in) They work well for my favorite Halloween word "BOO".


This project comes together so fast!  I cut 3 1/4" squares from a sheet of Moroccan Designer Series Paper.   I sponged the edges with my sponge dauber and Soft Suede ink.  Then as an afterthought I used my Gold Wink of Stella pen to on the edges as well.


This paper has a great selection of small geometric prints that are so versatile.


I cut the letters from Basic Black Card Stock using my Large Letters Framelits and painted them with the Gold Wink of Stella as well.  I love the gold shimmer on black -- classic Halloween look IMHO.  In the corner of the "B" block I stamped in Memento Tuxedo Black a single spider from the set Jar of Haunts.


On the second "O" I added 3 bats die cut from the Home Sweet Home Thinlits and attached them with scrunched up Mini Glue Dots.


Tried to show the gold shimmer in the photo above.


The panels were attached to the linen with glue dots.  What I love about this is when Halloween is over I will be able to easily remove the panels (and save them for next year) and use the frame for another project.  Is there a 3 letter word for Fall? Spring?  I could use JOY for Christmas, Brr for Winter, Hot for Summer.  Stay tuned.

Thanks for looking!

Debbie

Don't miss the great discounted product in the Clearance Rack!  Use September Host Code TYAEUADU  when you  place your online order


Thursday, September 22, 2016

Pretty Pine Holiday Card in White & Copper

Whew, finally ventured into my stamp room for some therapeutic creating!  I started by embossing the Pine Bough Embossing Folder on Whisper White Card Stock.  You could stop there, but the Pretty Pines Thinlits were within reach and I couldn't resist adding a few branches die cut from scraps of Shimmery White Card Stock. Oh my word I love the Pretty Pines bundle.

The Shimmery White contrasts just enough against the white to add a little more interest.  I cut a couple pinecones from that yummy Copper Foil Paper and ribbons from Real Red Card Stock, both elements from Pretty Pines.  Mounted those elements in the corner with Tombow Multipurpose Adhesive (aka green glue, though the glue isn't green :)


I knew I wanted to hang something from one of the branches.  The Starlight Thinlits have a couple of very small solid stars so I cut one of each from Copper Foil and decided to use the larger of the two. But, it seemed too flat so I grabbed my Pierce Mat and my trusty Paper Snips scissors and used the sharp edge of the scissors to press down and score the back of the little star giving it the dimension I was looking for.


I mounted that little star with part of a Dimensional and hung it with Copper Metallic Thread.  I added the greeting which is from Merriest Wishes (I was running out of energy, and it was right there) and I embossed it with Copper Embossing Powder


While the Shimmery White paper has a little shimmer I used my Clear Wink of Stella pen to frost the tips of the die cut branches and to highlight the embossed branches.  Finally I used Dimensionals to mount this layer onto a base card of Whisper White Thick Card Stock.  I just love this one!  

Thanks for looking! Don't forget to use the September Host Code TYAEUADU when placing an online order.

Debbie

Psst — those Clearance Rack Items are going fast!


Tuesday, September 20, 2016

Oh What Fun Feel Better Soon Card

Oh What Fun...


This beautiful card arrived the day after my foot surgery.  A friend and fellow demonstrator, Becky Roberts, sent it to me.  I love the double meaning of "oh what fun", the traditional Christmas one horse open sleigh might first come to mind for you.  But, as I am looking at 3 weeks of no weight bearing I hear the sarcastic "oh what fun" in my head.  Either way the card made me smile.

The Jar of Cheer is such a fun set and coordinates with another of my favorites Jar of Love Bundle.  There is also Jar of Haunts for a Halloween spin on the jar!  The greeting is from another great Christmas greeting set Oh What Fun.  I can't wait to recreate this card!


I am blessed with more family & friends that have sent cards and emails, stopped by with flowers, food and magazines. My daughter and SIL sent a book I've been wanting to read (but am still 66th on the list at the library,) and a son and DIL that sent an adult coloring book (my Stampin' Up! markers will work great in that), chocolate, a puzzle book and treasured artwork from my adorable grandsons.  Thank each and every one of you!

Getting around with one leg on a scooter is more difficult that I'd imagined but I'll be venturing into my stampin' space as soon as I can... is there such a thing as Stampin' withdrawal?  If so I'm suffering from it.

Thanks for looking!

Debbie

Don't forget to check out the Clearance Rack new additions are selling out fast

Sunday, September 18, 2016

Make a Custom Box & Some Cute Tassels

There are so many possibilities using the simple instructions you see in this video.  Make custom sized boxes and those cute tassels, too!  Perfect for neighbor gifts -- line with some parchment paper and fill with yummy baked goods, candy or caramel corn.


Here are the instructions for the tassels -- easy peasy!


I love the Fancy Frost Specialty Designer Series Paper used for the box tops.  The Bakers Twine Trio in the Holiday Catalog would be a beautiful choice for the tassels.

Tip -- Stampin' Up! recommends Fast Fuse Adhesive for these boxes and in the video there is a tip for getting the best results with applying Fast Fuse by changing your grip.

Thanks for looking!  I hope to have personal projects to share again soon but I'm recovering from some major foot surgery and getting around just isn't easy right now.

Debbie

Be sure to check the Clearance Rack -- many new items were just added!


Friday, September 16, 2016

Swirly Scribbles Birthday Card

This simple layout using the Swirly Scribbles Thinlits is fun to play with, so many possibilities.  I cut the long die from Silver Glimmer Paper and a second time from Blushing Bride.


I tucked in the "scrap" pieces of Blushing Bride into the matching open spots on the glimmer.  I added some flowers cut from the Botanical Builder  but they needed a little something else so I cut some flower elements out of the long Florish Element Thinlits to layer behind the flowers.  Added pearls to the middle of the flowers


The little diamond scraps from that thinlet are too adorable to discard so I scattered them onto the background glueing them with Tombow Multipurpose Adhesive and put a tiny pearl on each one.


Finish it off by adding a greeting in Basic Black.

Thanks for looking!

Debbie

Be sure to check out the new items added to the Clearance Rack

Wednesday, September 14, 2016

Glamper Greetings - The Little Pink Trailer


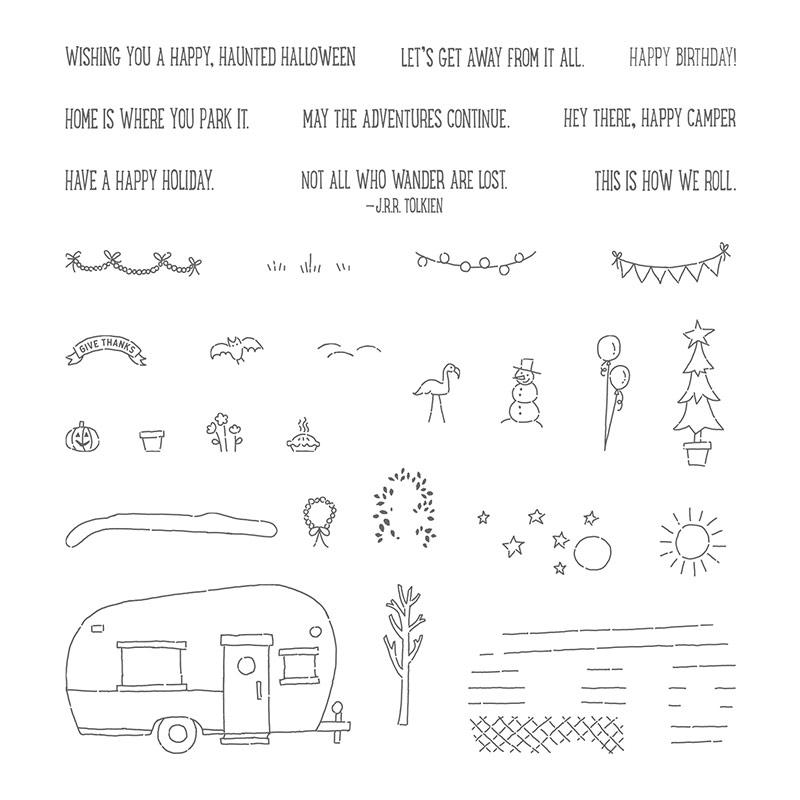
This adorable stamp set is a new favorite of mine.  Glamper Greetings is available now in the Holiday Catalog.  You    Will    Want    This    One!


Which reminds me The Host Code for September is TYAEUADU.  So when you place an online order (except if your order is $150 or more of product) with me be sure to enter that in the box on the bottom left of this page:


Look at all the fun accessories and greetings for this cute little trailer.
I fussy cut the trailer and used dimensionals to pop it off the page.  It's colored with Blushing Bride, Flirty Flamingo and Basic Black markers.


The trailer is "parked on" a strip of Washi Tape from the Affectionately Yours set, which is on top of part of a Delicate White Doily.  Under all that I used the Clear Wink of Stella to add some glimmer. Truth be told I used a Decorative Mask that is no longer available and the leaf pattern from the Seasonal Decorative Masks would have been a better choice.  Oh well, too late now...


I added some loops of Silver Metallic Thread under the greeting banner and some Rhinestone Basic Jewels. I punched a hole out of the round window in the door and put some Window Sheet behind it. Because this is a photopolymer set it was easy to precisely place the pie in the window (it's an apple pie just in case you wondered).

Look at these cards made by Stampin' Up! Concept Artists


Thanks for looking!  I know you will want this set

Debbie


Shop 24/7 from my online store.  Don't forget to check great deals in the Clearance Rack, new items were just added on September 13.

Monday, September 12, 2016

Clean and Simple (CAS) Copper Leaves Thank You Card

This card is inspired by a card I saw on Pinterest — it didn't use Stampin' Up! product but I knew I could make it with my SU supplies.  I love cards with lots of white space but I also love embellishments.  I resisted adding anything else to this card, leaving all that glorious white space.  The photo is a little wonky so I could get the copper to show.


Start with a base of Thick Whisper White.  With a pencil I hand drew an arc.  Using the leaf from the May Flowers Framelits I cut the leaf 3 times at varying angles then trimmed the lower right edge off with my Paper Snips.

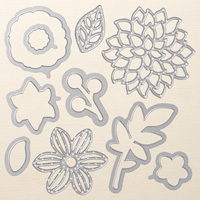
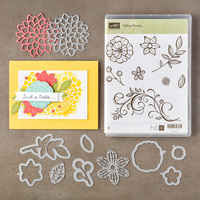
May Flowers Framelits Dies Falling Flowers Clear-Mount Bundle

From the Copper Foil paper I cut 3 more leaves.  I embossed a 4 1/4 x 5 1/2 piece of Whisper White with the Woodgrain Embossing Folder and adhered it to the back side of the front of the card.  Then adhered the copper leaves with Tombow Multipurpose Adhesive .


Emboss the greeting with Copper Embossing Powder.  I used the thank you from Thoughtful Banners.  That's it!  Fast, easy, elegant  — change the greeting to whatever you need!


Tip:  The cool thing about using photopolymer stamps, as I did here, is they can be shaped a little.  I added just a little curve to the greeting to match the line of the arc.

Thanks for looking!

Debbie

Shop 24/7 from my online store.  Don't forget to check great deals in the Clearance Rack

Saturday, September 10, 2016

BOO! Halloween Card


There was an Pumpkin Pie "O" die cut sitting on my desk, and it made me think of a pumpkin so I ran with the idea. I grabbed the Large Letter Framelits and cut the rest of the word. These pumpkins won't scare anyone though.


The Woodland embossing folder  embossed on Tip Top Taupe provides the background.  I only embossed the top 3/4.  The "ground" is Always Artichoke cut from the Swirly Scribbles Thinlits.  I stamped the stem from the Jar of Haunts in Basic Black and used my Blender Pens to add a little color.


To make the embossed trees stand out a little more I used an Aqua Painter to highlight the raised parts then used the Clear Wink of Stella for the lines in the trees.  While I love my little pumpkins, turns out the trees are my favorite element on this card.


Base card is Always Artichoke, the top layer is Tip Top Taupe layered onto Basic Black

Thanks for looking!

Debbie

Shop 24/7 from my online store.  Don't forget to check great deals in the Clearance Rack

Thursday, September 8, 2016

Spooky Halloween Jar of Haunts Card

The Halloween set Jar of Haunts has been begging to be used.  The floating eyeballs are my favorite element and the Ghoulish Grunge set is a perfect compliment. Both are in the new Holiday Catalog.


The brick element from Ghoulish Grunge was stamped repeatedly in Sahara Sand onto Very Vanilla Card Stock.  I stamped the cheesecloth in Versamark and embossed it with Whisper White Embossing Powder then I grunged the layer up with a Sponge Dauber and Soft Suede Ink.  The drip is stamped in Cherry Cobbler. The jar and eyeballs were stamped with Jet Black Stazon onto Window Sheets.


To ground the jar so it isn't just floating on the page I added a trimmed piece of 5/8" Burlap Ribbon and some Black Bakers Twine to create the shelf.  The tag was stamped using part of a greeting from Glamper Greetings onto a narrow strip of Very Vanilla. 


I used my Chalk Marker to color on the back of the eyeballs -- the white added contrast and just made them stand out a little more. The base is Cherry Cobbler Card Stock.

Thanks so much for looking! 

Debbie  

Shop 24/7 from my online store.  Don't forget to check great deals in the Clearance Rack